
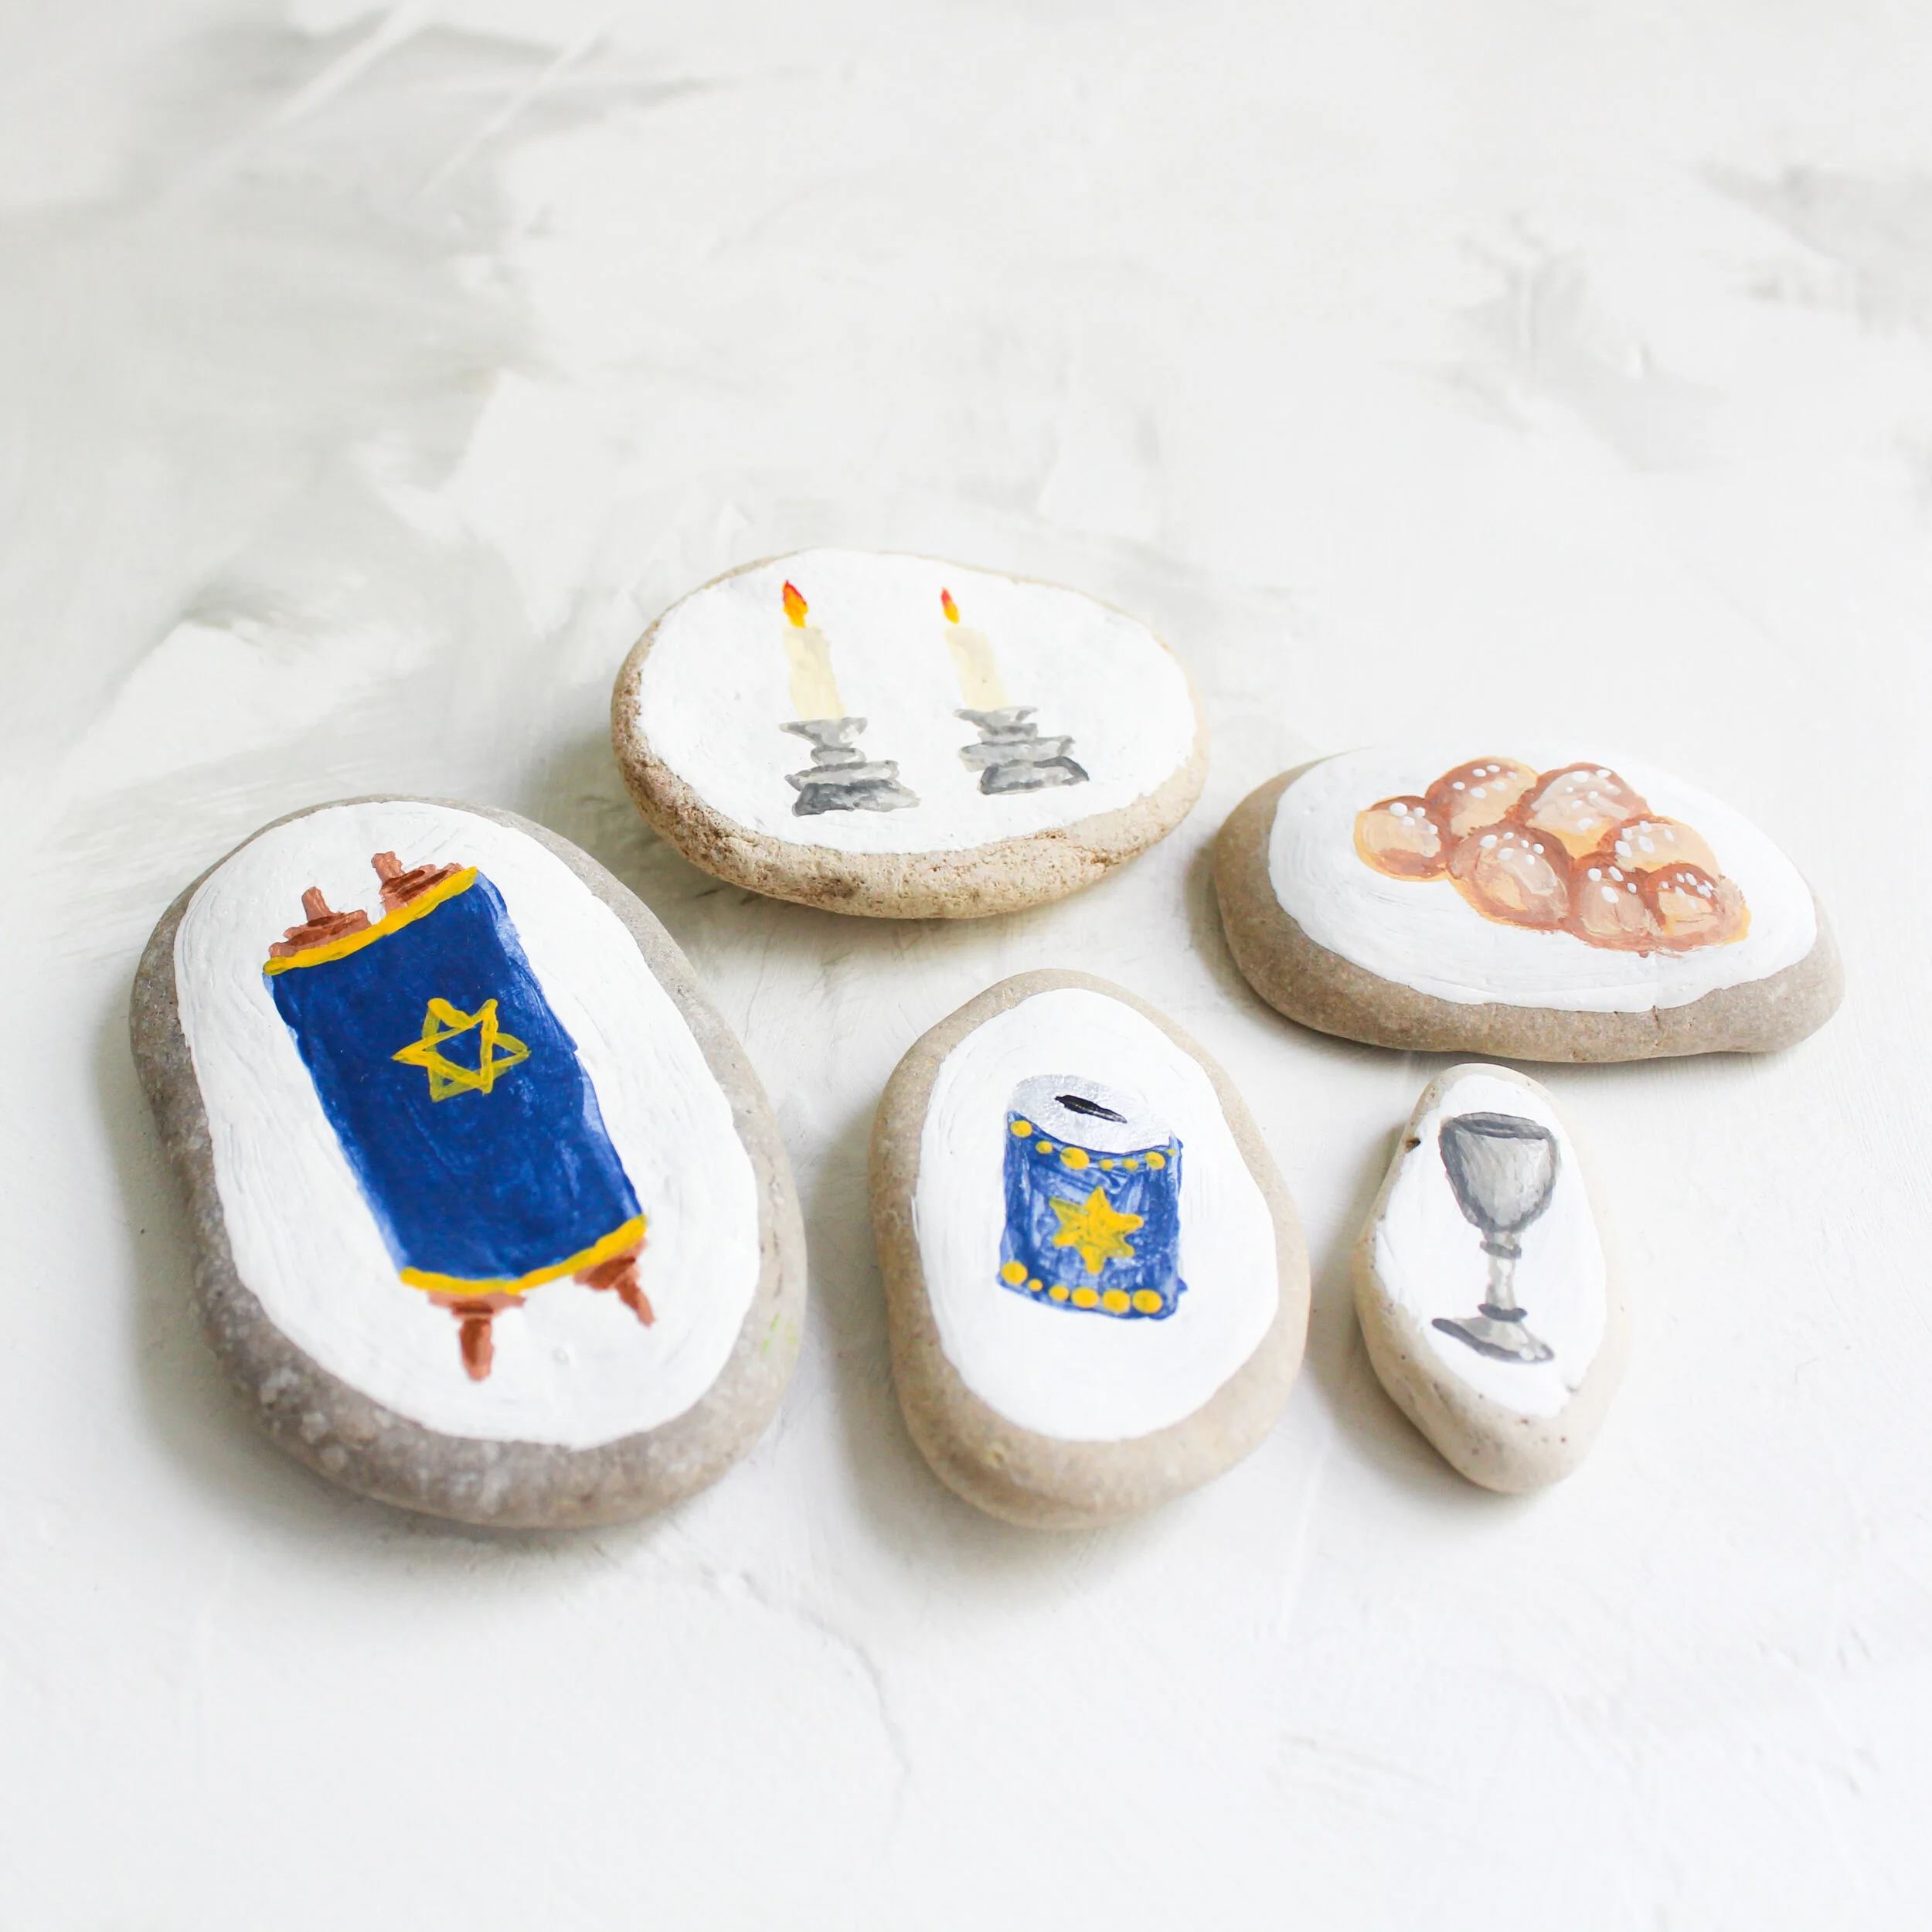
SHABBAT ROCKS
Rocks make the perfect canvas for any painting — your kiddos will love painting their own Shabbat scenes on flat rocks! It also will give them a chance to take a closer look at the pieces and parts of Shabbat — candlesticks, kiddush cup, challah, the Torah, tzedakah box, and so much more! Happy painting!

TEENY TINY SHABBAT SET
Could this be more adorable? It’s hard to imagine how! Kids love creating anything that’s teeny tiny, and this Shabbat set is no exception. It gives them a chance to take a really close look at Shabbat candles, a kiddush cup, and challah to recreate them. Their little masterpiece could be a decoration for your Shabbat family dinner, a special set for little dolls to play with, or…they could just make it for the joy of making it, which is always a great way to go!
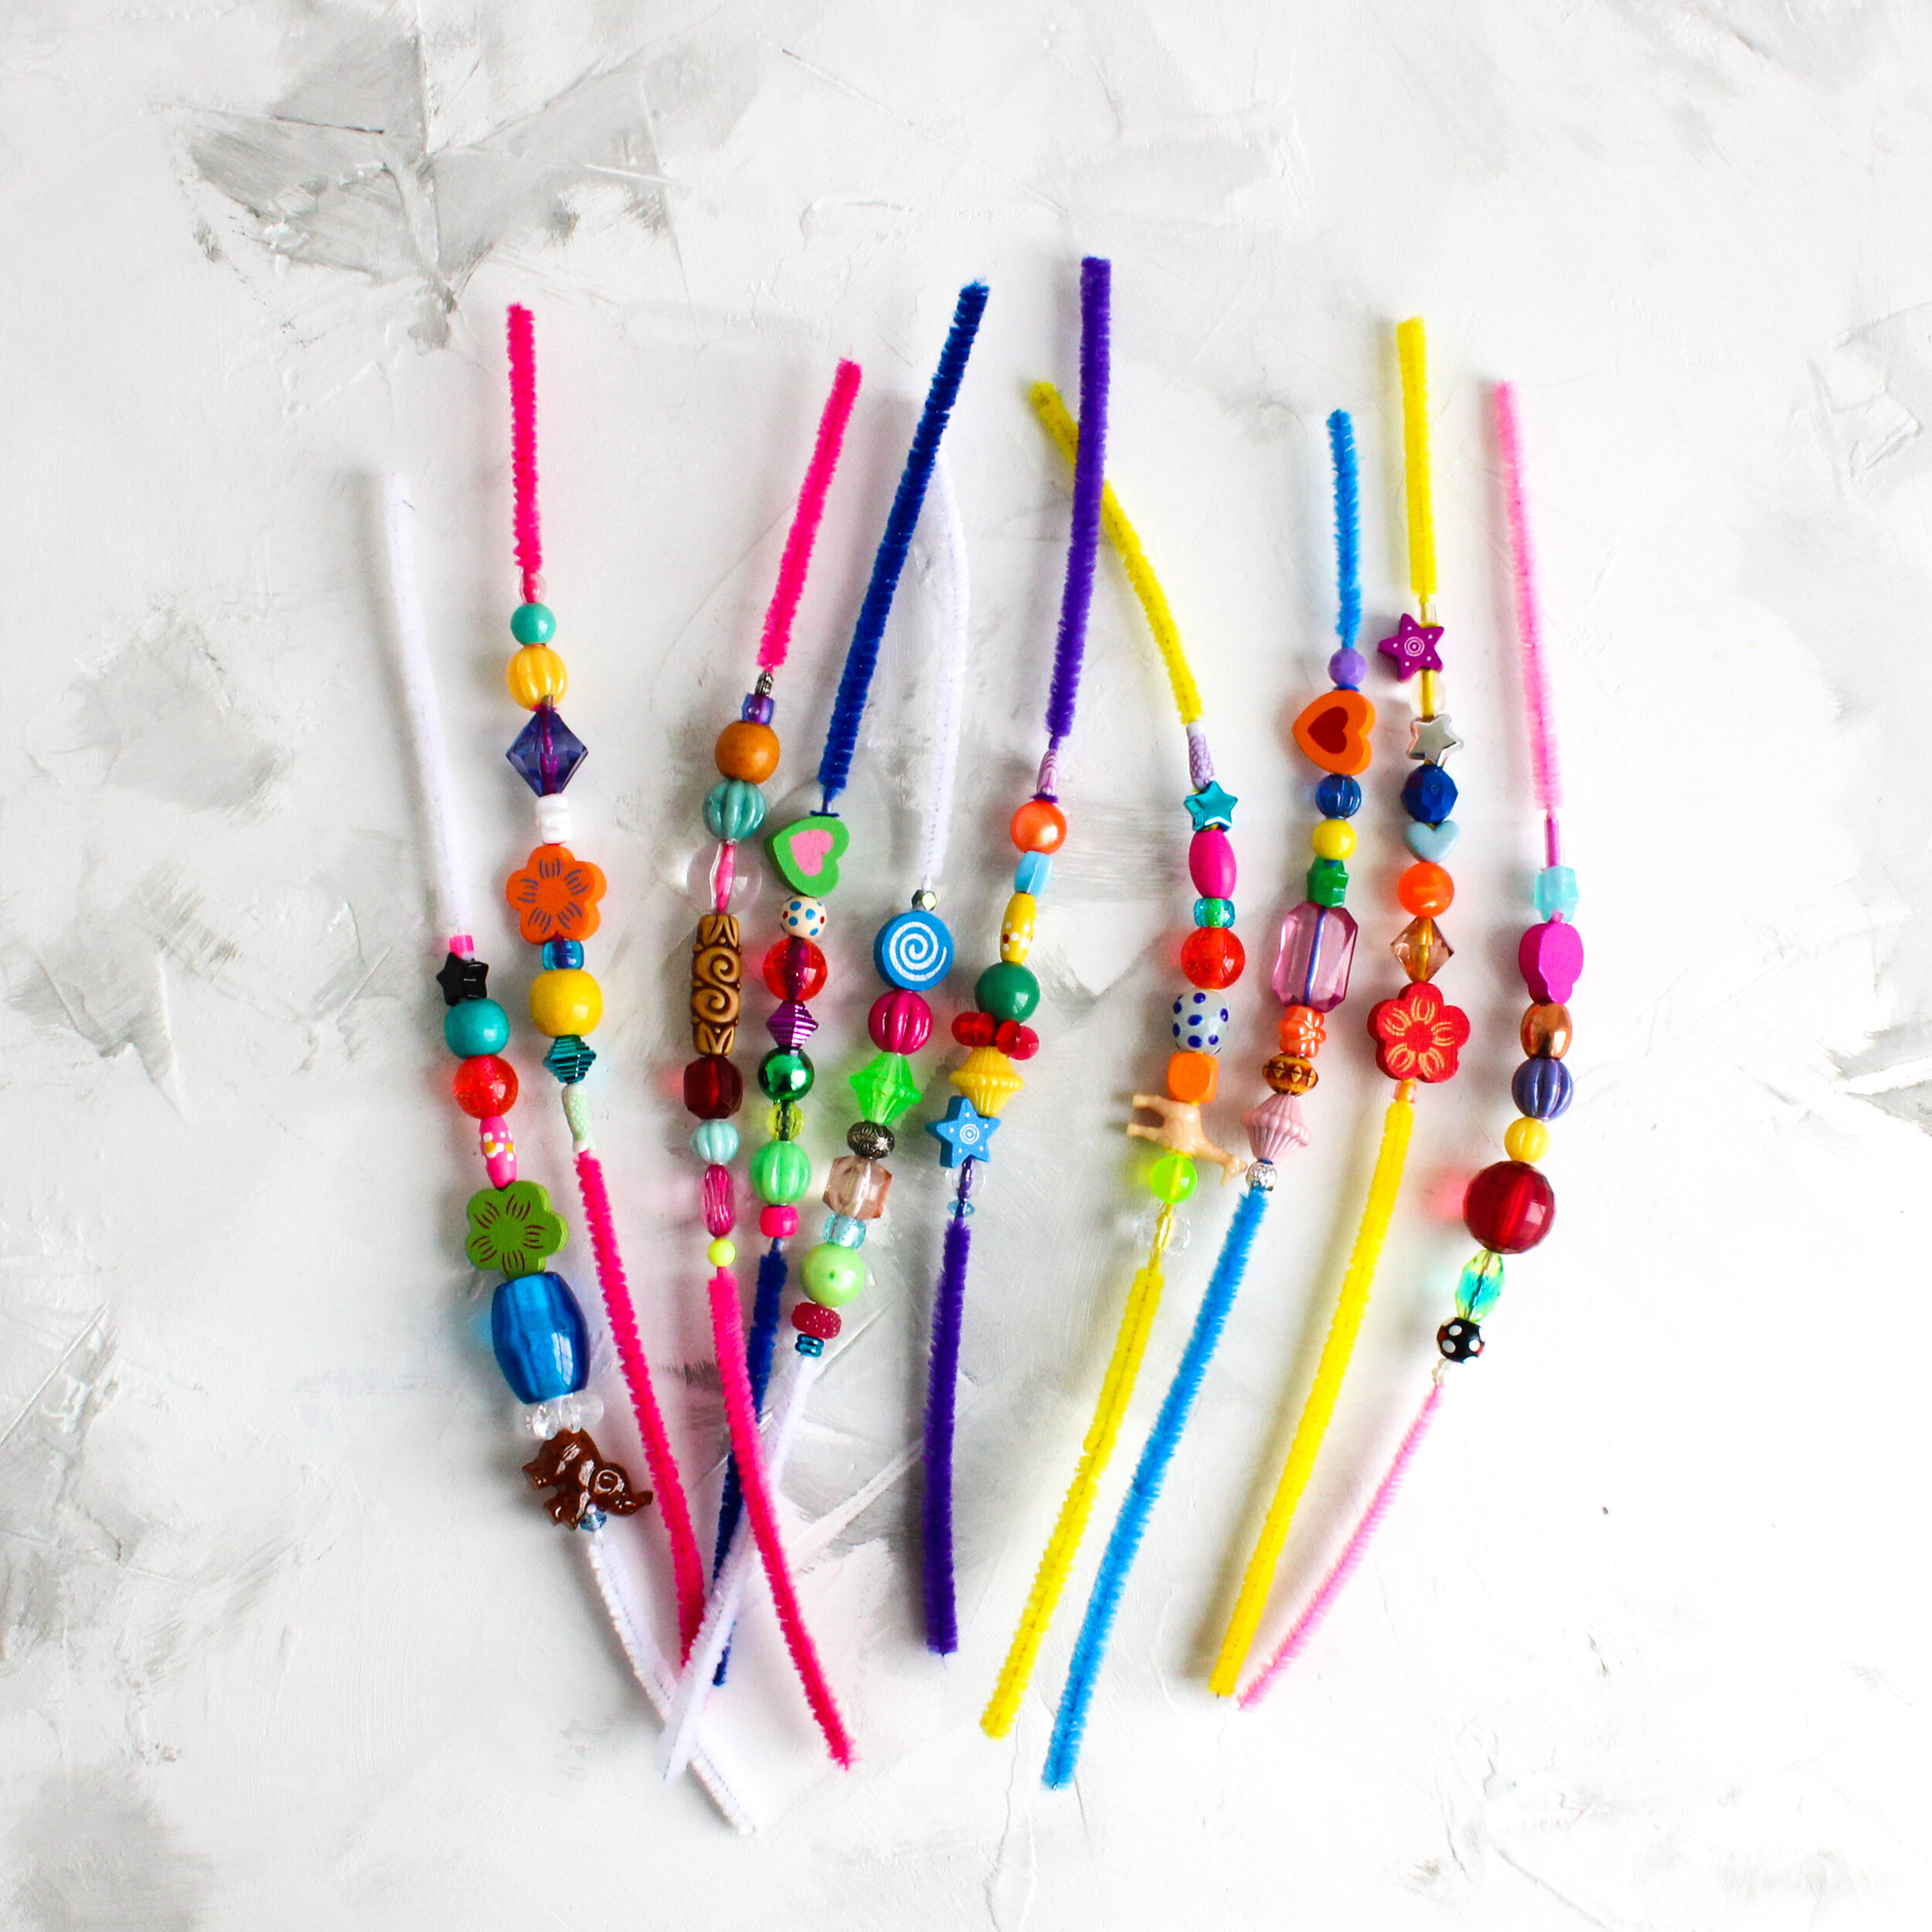
COUNTING BLESSINGS AND BEADS
The Talmud teaches us that we must each recite at least 100 blessings a day. Doing so encourages us to live a life focused on gratitude and helps us truly appreciate all the good in our lives. This simple craft gives kids a tangible way to count these daily blessings and to see what 100 looks like. Plus, they have so much fun examining the beads, deciding which ones to choose, and then stringing them onto the pipe cleaners — ten beads each on ten pipe cleaners. Surprisingly, even the tiniest beads fit on the pipe cleaners, reminding us that we should say a blessing even for the seemingly smallest good things in our lives.

CHALLAH BRAIDING WITH PLAY DOUGH
Playing with play dough truly is the best! It’s so fun to roll it, squish it, and mold it into shapes. One Jewish shape you can try making is a challah — just roll your dough into three long and skinny strands, and then braid them together. Voila! Challah! You can use your play dough challah as a Shabbat decoration if you’d like, or you can just make it for fun. Try making them in a bunch of colors!

CHALLAH COVER FOR SHABBAT
Shabbat is such a special holiday; we want to do everything we can to make it beautiful and pleasing. In Hebrew, this is called Hiddur Mitzvah — enhancing a mitzvah. Everything from tidying up our home to cooking a delicious meal to setting out a fresh bouquet of flowers makes Shabbat extraordinary. One way you can make Shabbat simply magnificent is to make your own challah cover. Use lots of colors and draw whatever designs you like. Make sure you write your name and the year, too — you will surely cherish it (and use it!) for many years to come, and you’ll want to know when you made it!

WOODEN SHABBAT CANDLESTICKS
What is the best kind of Shabbat candlesticks? You guessed it — the ones you paint yourself! Create your own dazzling designs on wooden candlesticks, and your Shabbat celebrations are sure to be extra delightful!

BABY MOSES IN THE RIVER
This is the first Passover craft I do with my kindergarten class each year, and they always love it. It’s a great craft to do once you’ve shared the Passover story because it highlights this life-changing moment for Moses. There are a lot of pieces and steps to it, but kids truly enjoy cutting the oval for the “water” and lots of little strips of cardstock for the “reeds,” drawing a little face on Baby Moses, and of course tucking him in with a cozy blanket! You can have your kiddos’ masterpieces on your seder table, and they’ll be so proud to show everyone what they’ve made, especially when you get to the Baby Moses part of the haggadah!
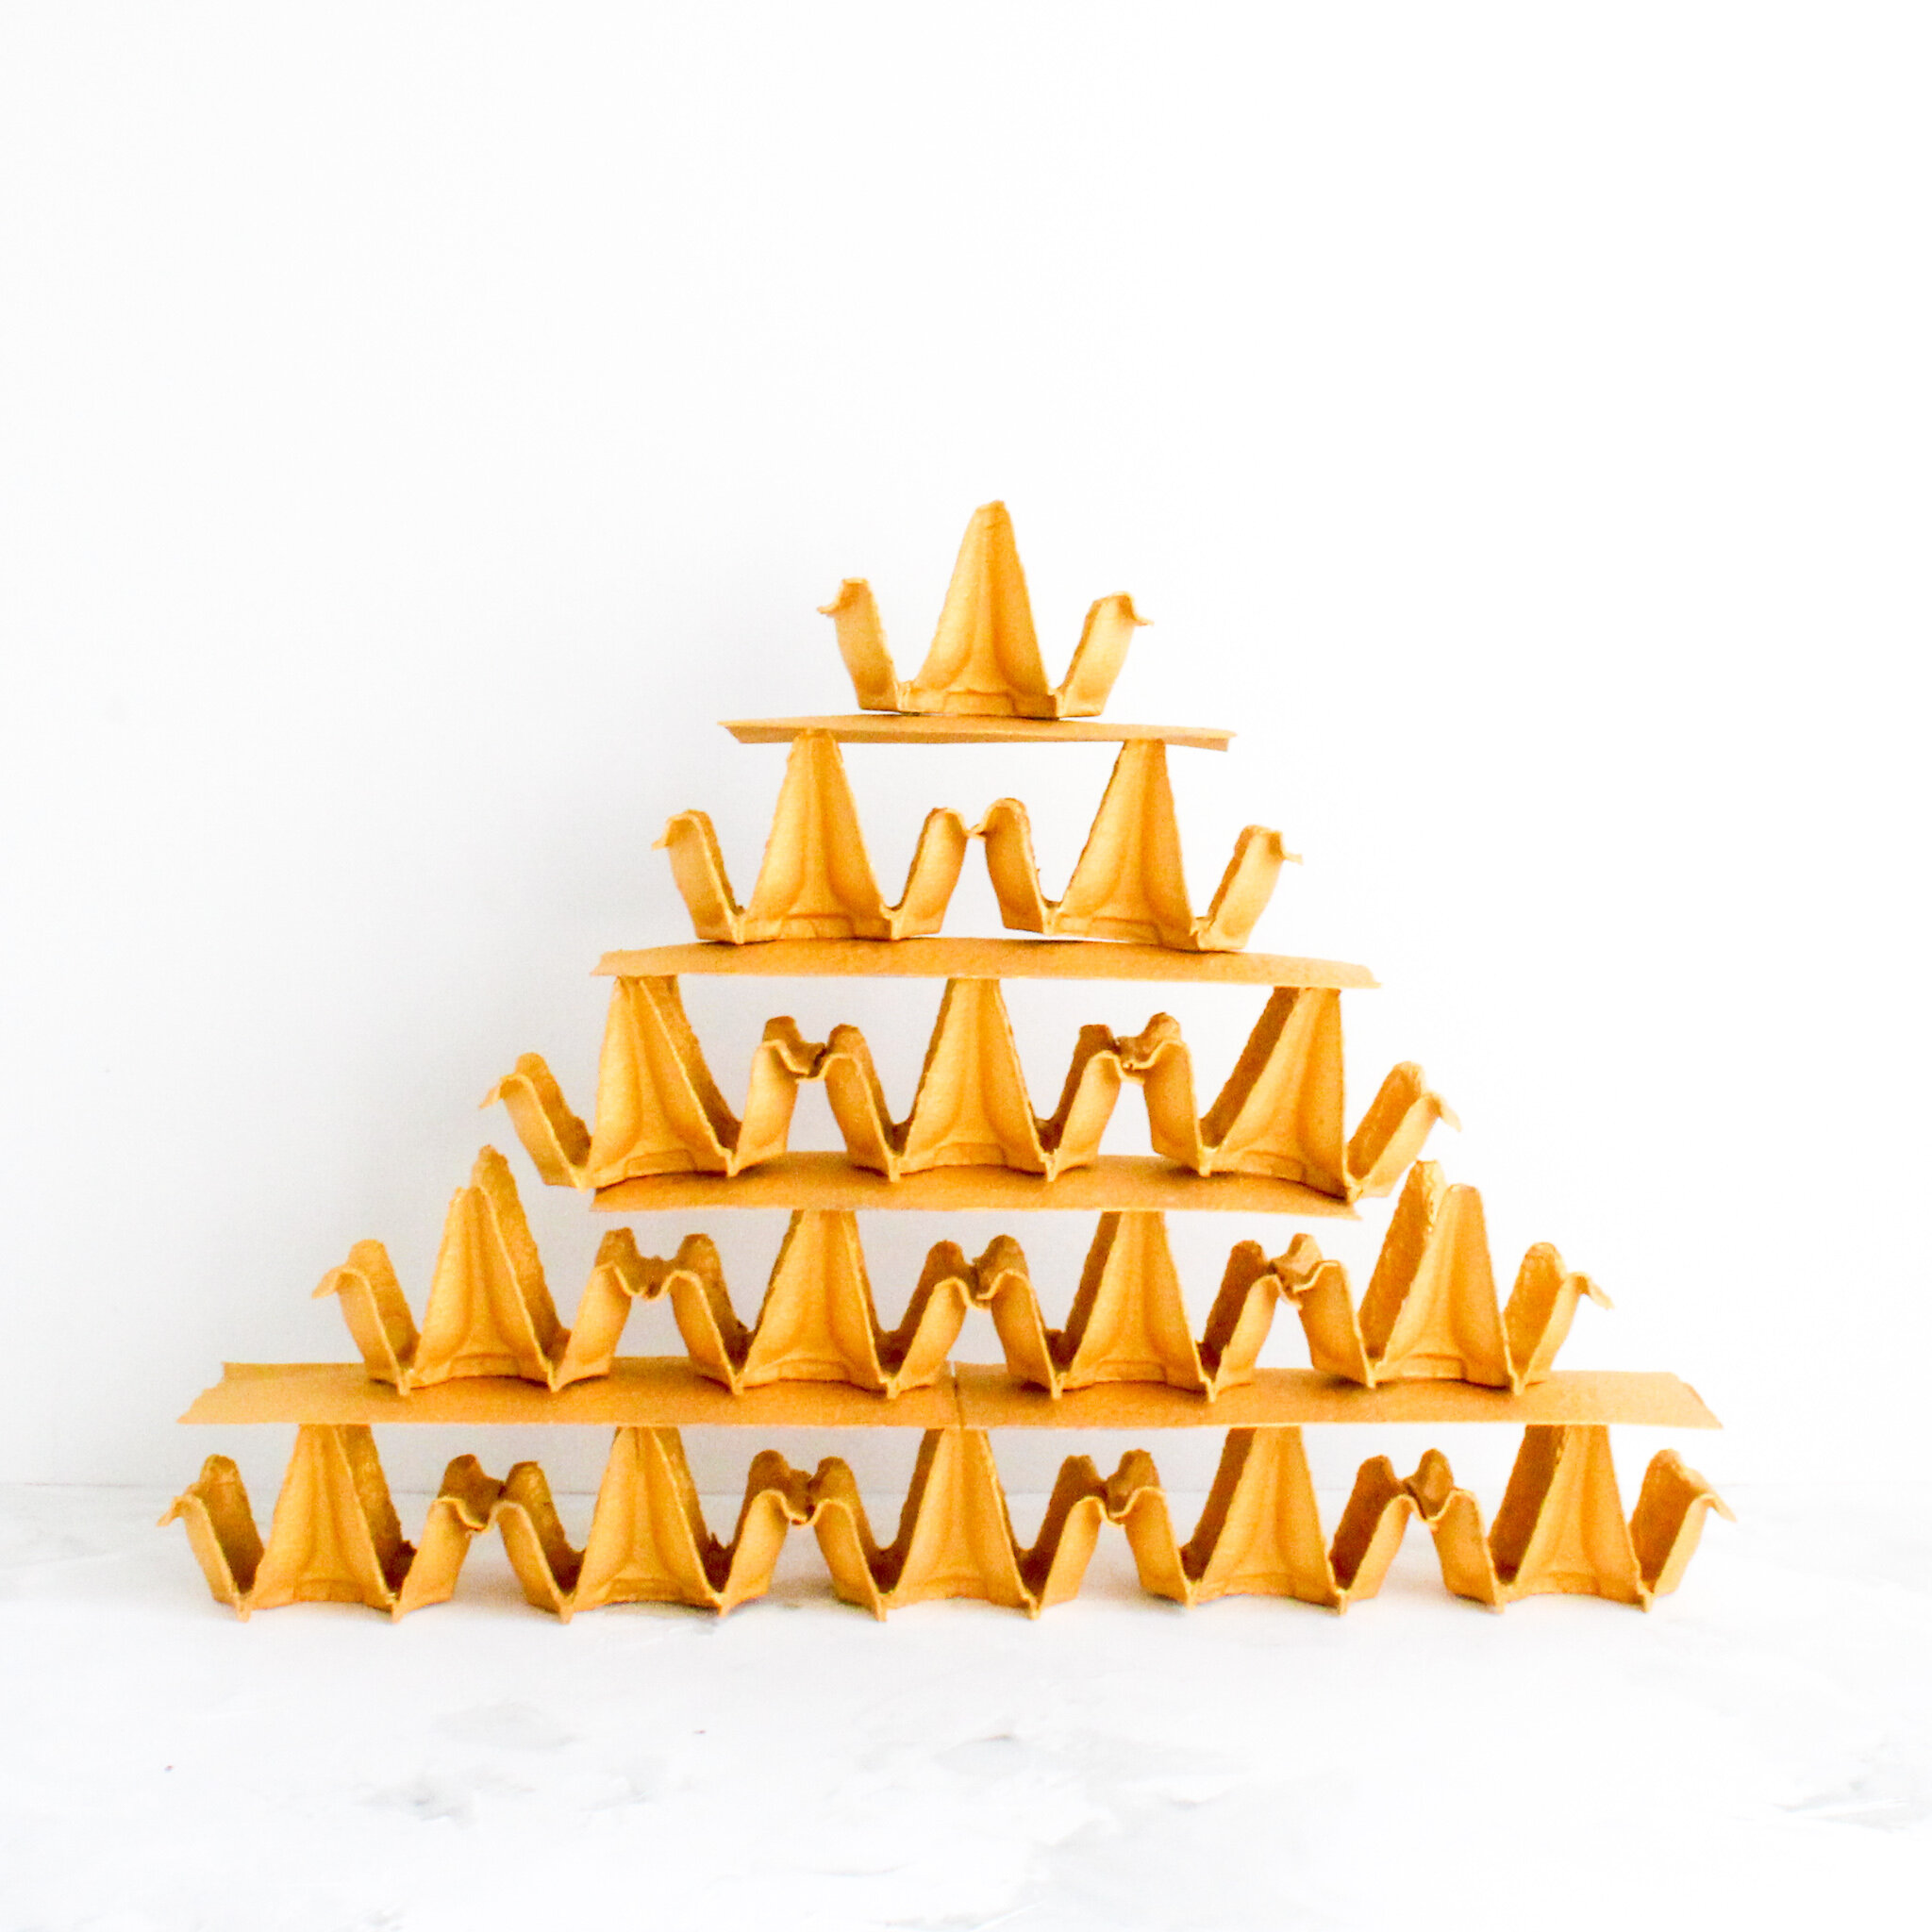
EGG CARTON PYRAMID
In telling the Passover story, we say that WE were slaves in Egypt — WE, not THEY. When we teach our children to internalize this shared experience of oppression to freedom, we are also teaching them empathy. We are teaching them to have awareness of the oppression, inequality, and tragedy that still exists in the world today. We are teaching them that they have a responsibility to repair the world in any way they can. Building an Egg Carton Pyramid is of course very fun, and your kiddos will surely love it! But in the process, you can also have an age-appropriate conversation that helps them begin to understand what it means to be a slave. What if you built these pyramids all day every day and didn’t have a chance to rest? What if each of these “bricks” weighed as much as you do, but you were expected to keep building and building, even if you were tired, and even if you were in pain? What if a leader led you and all the other slaves out of Egypt to freedom — how would you feel?

YARN-WRAPPED MINI TAMBOURINES
When the Israelites fled Egypt and reached the other side of the Red Sea, they sang and danced because they knew they were free. Add some extra joy and music to this part of your seder with these adorable mini tambourines! Made with bangle bracelets, mini jingle bells, and yarn, these little sound makers are so fun to make and even more fun to use! Chag Pesach Sameach!

CUPCAKE PAPER SEDER PLATE
Won’t your kiddos be bursting with pride when they have their very own seder plate at your family Passover seder?! This adorable craft is fun and easy, and your kiddos will be able to put real seder plate foods in the little cupcake papers if they wish. How fun that will be! I created a Passover Seder Plate PDF (it’s free — yay!), which includes graphics of each seder plate food and also blank circles if they want to draw their own pictures. Chag Pesach Sameach!
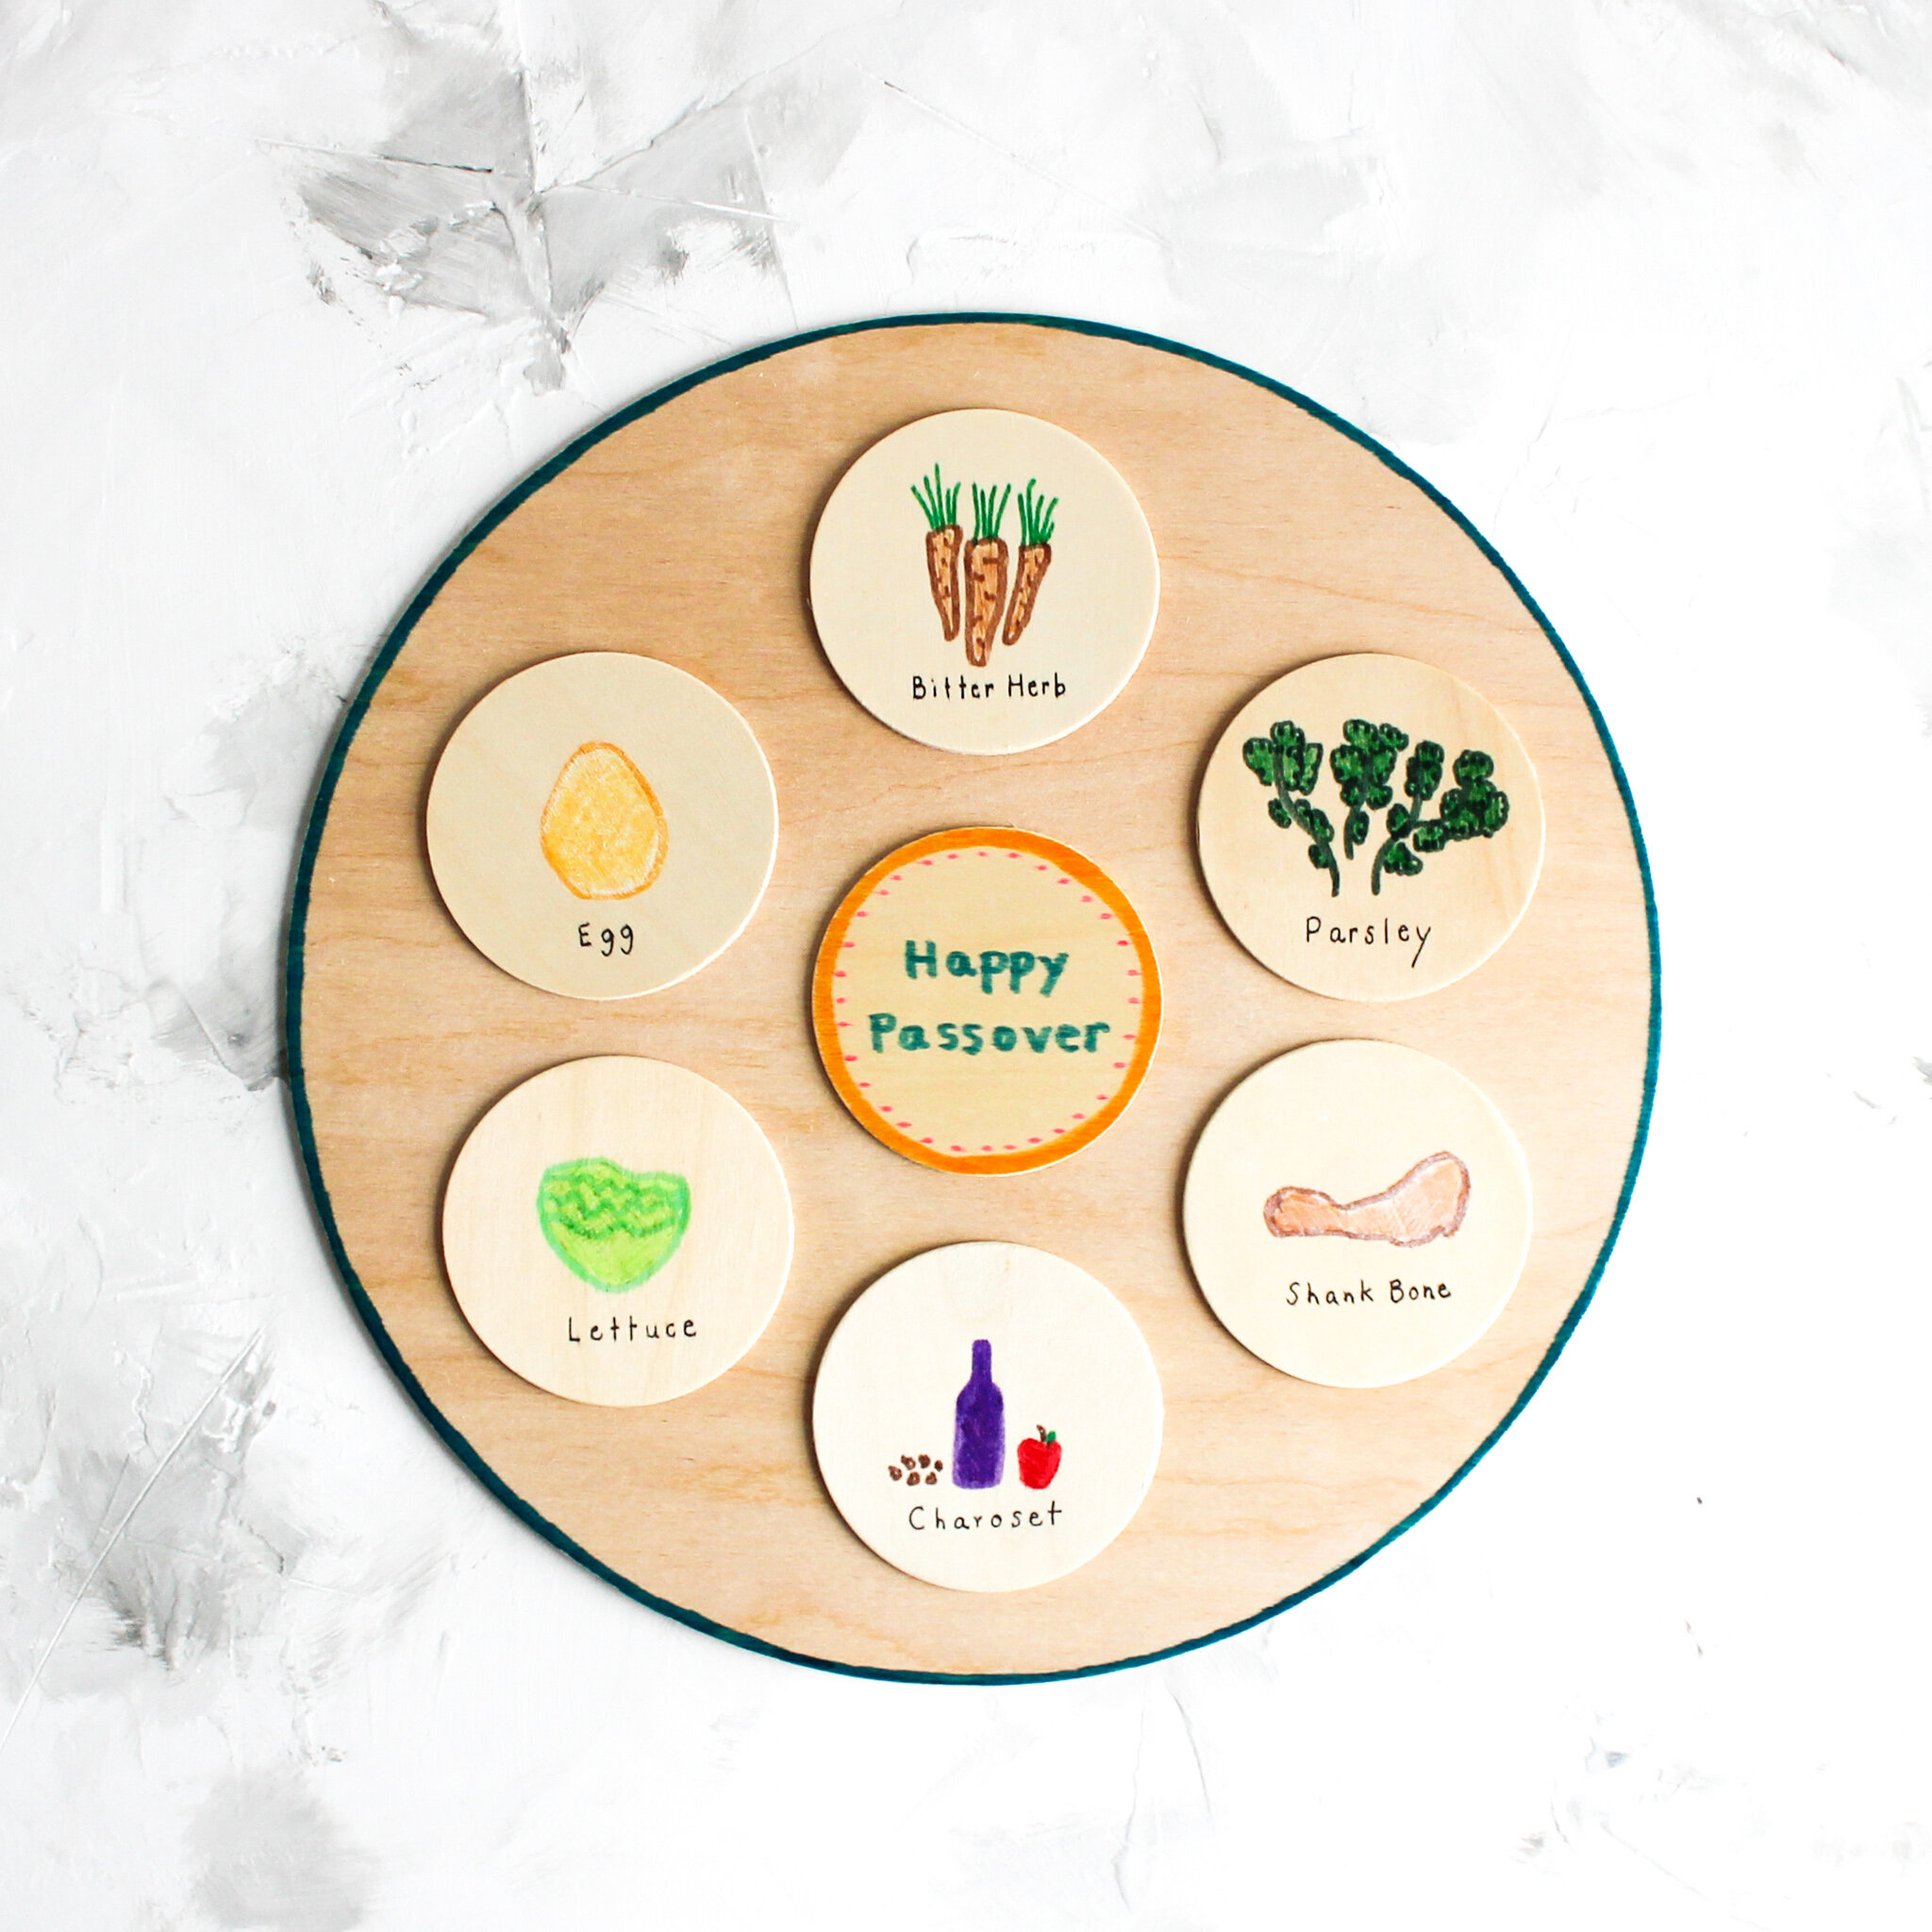
WOOD SEDER PLATE
With this craft, children are able to closely examine and draw each item on the seder plate — what a fun way to learn about this central part of the Passover celebration! Children’s drawings are incredibly precious, and this craft will surely be a family keepsake that you will treasure for many Passovers to come!

AFIKOMEN BAG MADE WITH GROCERY BAG
Looking for the afikomen is the highlight of the Passover seder for kids, and with this eco-friendly craft, they’ll have a special place to put the afikomen before the grown-ups hide it! All you need is a paper grocery bag, scissors, a hole punch, yarn, and whatever you want to use to decorate it. There are endless possibilities for creativity, and it can be used year after year! This afikomen bag will surely become a family treasure for many Passovers to come!

DUCT TAPE MATZAH TRAY
Add some color to your seder table and keep your matzah organized and easily accessible with a Duct Tape Matzah Tray! Working with duct tape is super fun, especially since there are so many different colors and patterns to choose from! Kids will enjoy covering five pieces of recycled cardboard with their favorite colors and patterns and then the grown-ups can hot glue everything together (only grown-ups should use the hot glue gun, of course). Your beautiful and unique matzah tray will be surprisingly sturdy, and your whole family will look forward to using it year after year! Chag Pesach Sameach!

FOUR QUESTIONS BOOK
Truly one of the best parts of the Passover seder is when the kids sing The Four Questions! In our family, we have all the kids sing it together, and when they do, it fills the room with joy! Help your kiddos prepare for their big moment with this simple FOUR QUESTIONS BOOK that includes the Hebrew, transliteration, and translation of each question, plus a large outline number that they can decorate any way they like. Chag Pesach Sameach!

MATZAH BOX JEWISH STARS
During Passover week, we all eat A LOT of matzah! And with all that matzah eating comes lots of matzah boxes. These can of course be recycled, but it’s much more fun to make Jewish Stars out of them instead! For this super simple eco-friendly craft, just cut two triangles of the same size from a matzah box, glue them together with one triangle pointing up and the other triangle pointing down, and voila — you have a Jewish Star! To make this craft even easier, I created a free Jewish Stars Template that includes six different sizes of triangles to trace. Hope you and your family have a super fun time setting up a Jewish Star Factory and making lots and lots of Jewish Stars! Chag Pesach Sameach!

GROCERY BAG PURIM CROWN
This craft might very well be the crowning glory of your family Purim celebration! Your kiddos will love dressing up as Queen Esther or King Ahasuerus and wearing a stunning crown of their own creation. Surely they will be the talk of Shushan with this eco-friendly, simple, and colorful craft! I created a basic panel template that kiddos can trace to create their crowns, or (and even better) they can draw their own and make a fancy schmancy design. Chag Purim Sameach!

LITTLE CLAY HAMANTASCHEN
Oh my goodness — this craft is so fun, and it’s a GREAT way for kiddos to practice making real hamantaschen! Polymer clay comes in so many colors, too; so you can make a rainbow of adorable little hamantaschen! Use them as Purim table decorations, for pretend play with dolls, or for whatever you like!

SPONGE-PAINTED MISHLOACH MANOT BAGS
Spread extra Purim joy with some sponge-painted mishloach manot bags! Mishloach manot, which is one of the four Purim mitzvot, are fun care packages that we give to family and friends — fill them with food, hamantaschen, candy, drinks, and whatever surprises you think would be delightful! Download the free Purim Sponge Painting Templates PDF and trace either hamantaschen, a crown, or a Jewish star (or all three!) right on your sponges. Cut them out, dip them in paint, and design your bag however you like. Your bright and cheerful mishloach manot bags surely will make Purim festive and joyful for your dear ones!
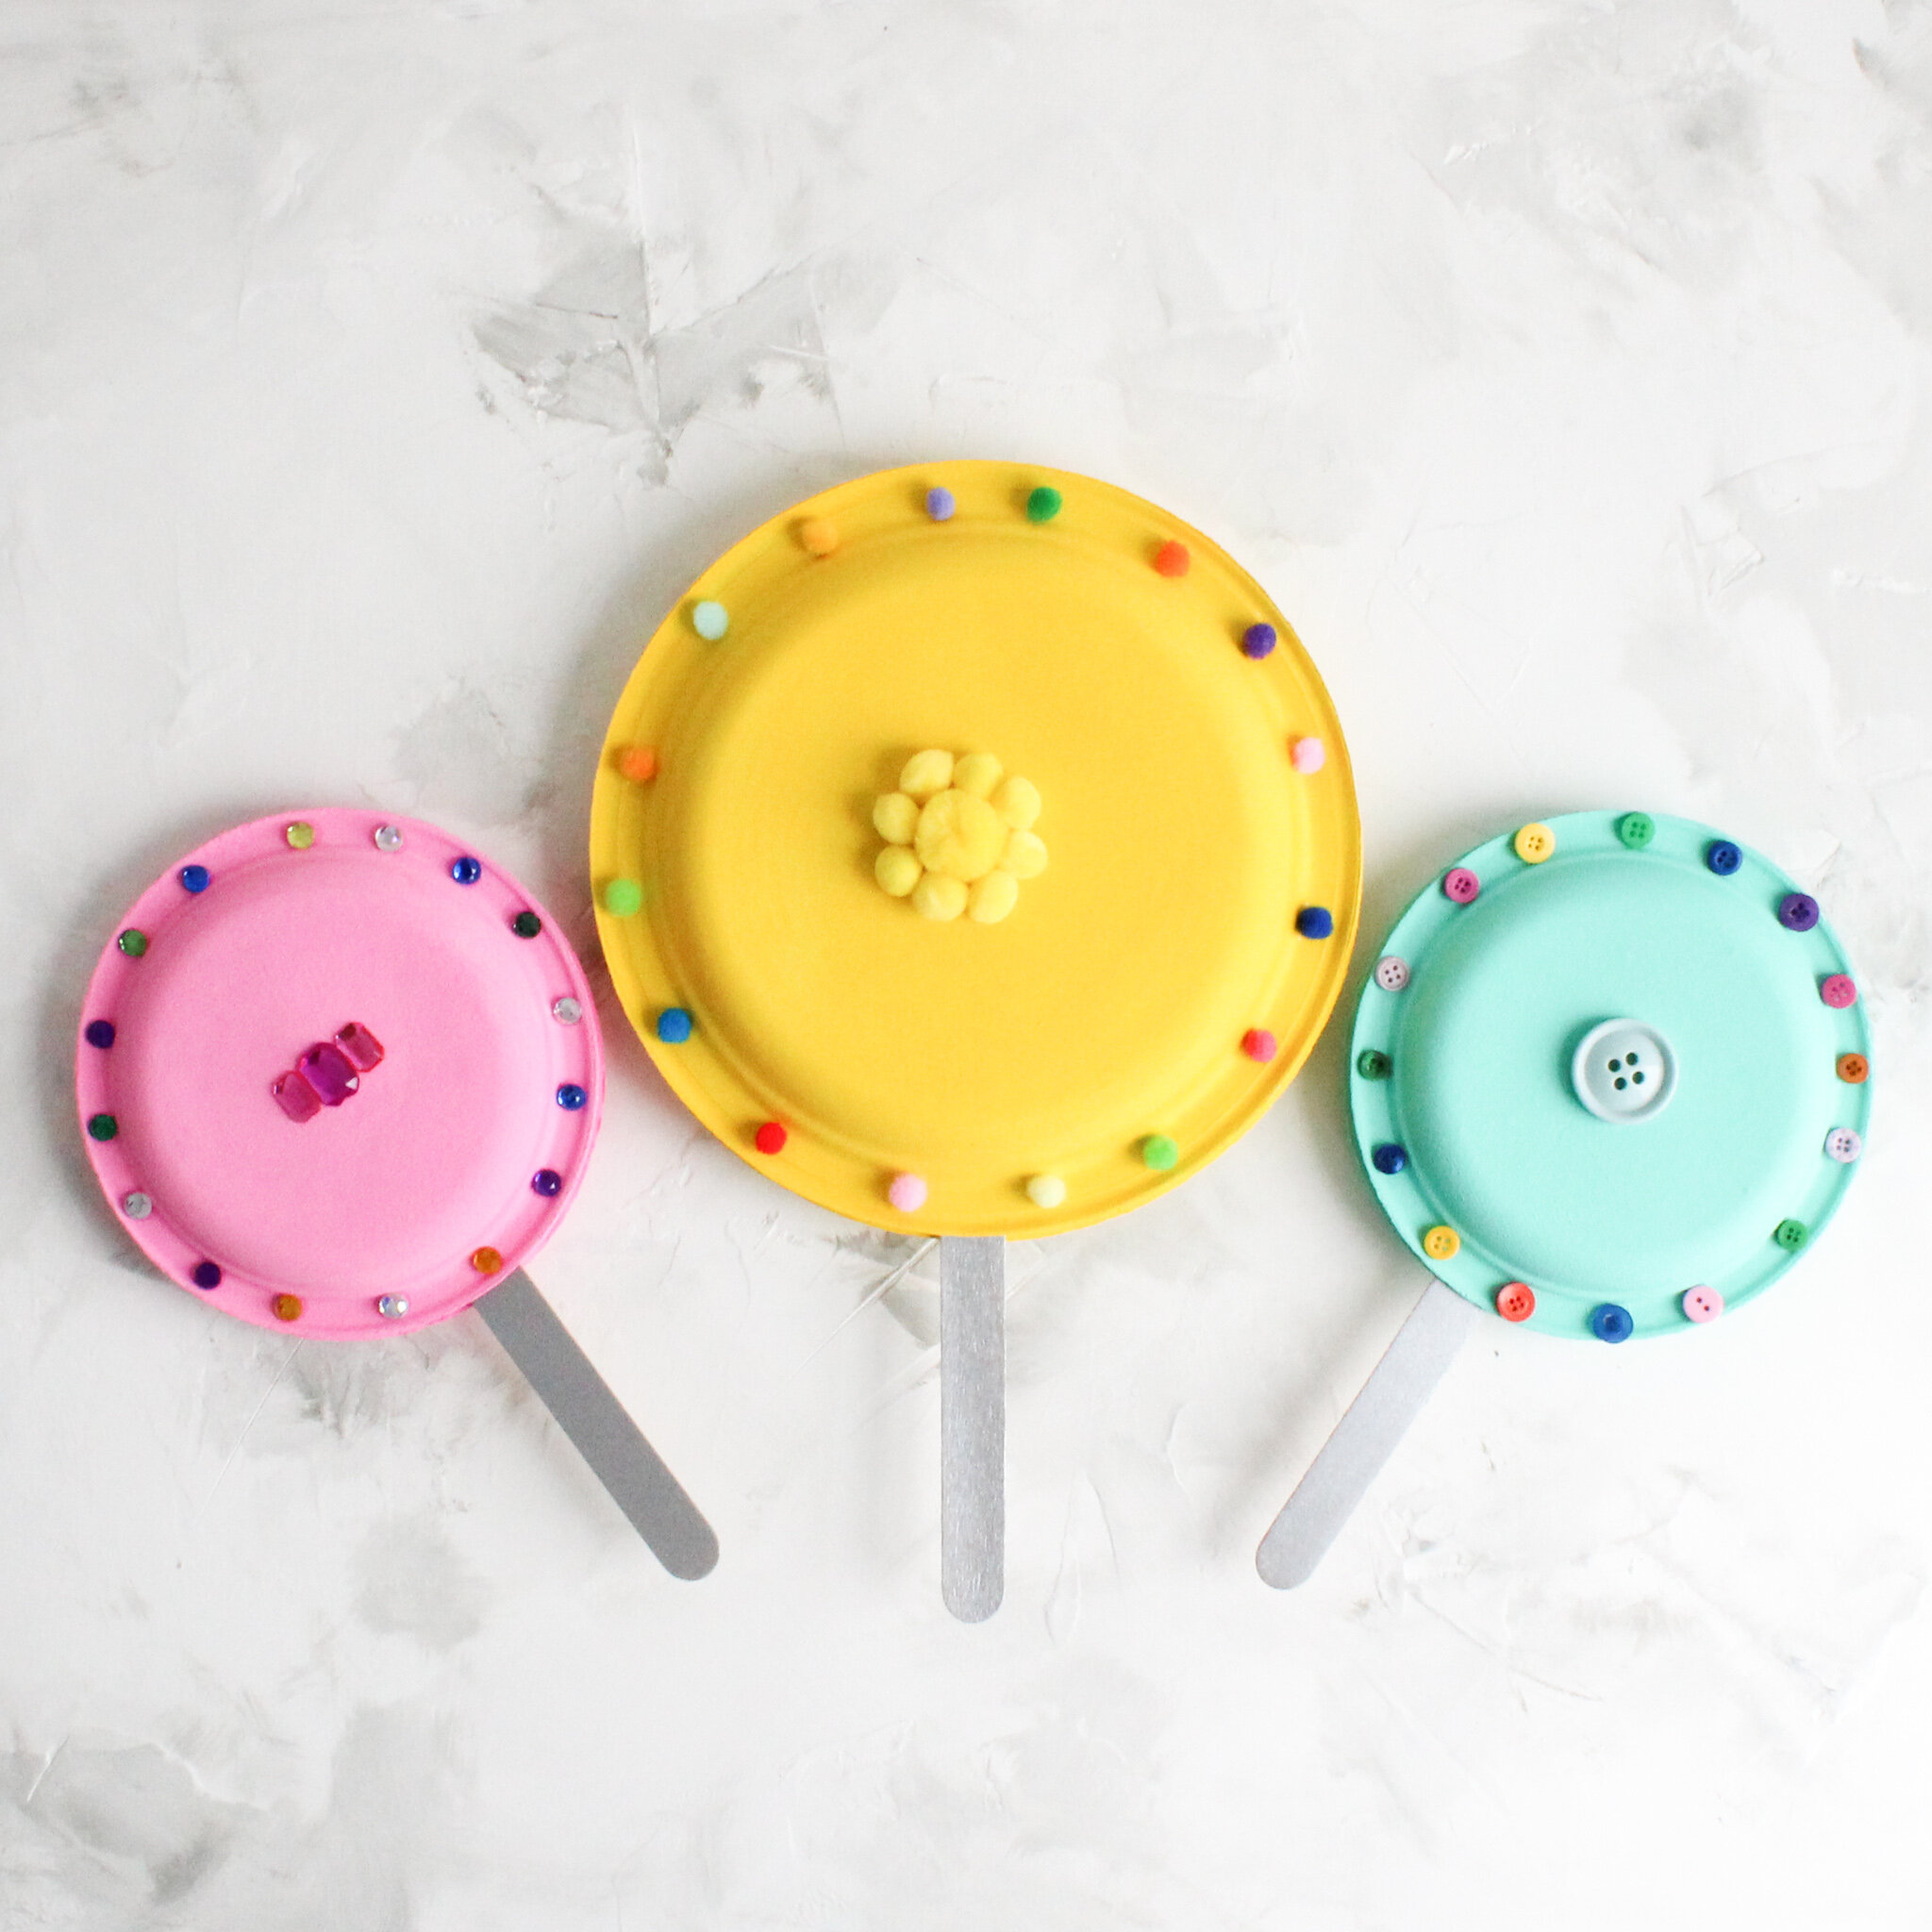
PAPER PLATE GROGGER
Get ready to make some noise with this fun and colorful Purim craft! Just put some beads, buttons, or little bells in a paper plate; put another paper plate on top of it; staple (or glue) all around; decorate however you want; and voila — you have a festive grogger for Purim! I love this craft because there is endless room for creativity; plus, what would Purim be without some noisy homemade groggers?! Chag Sameach!
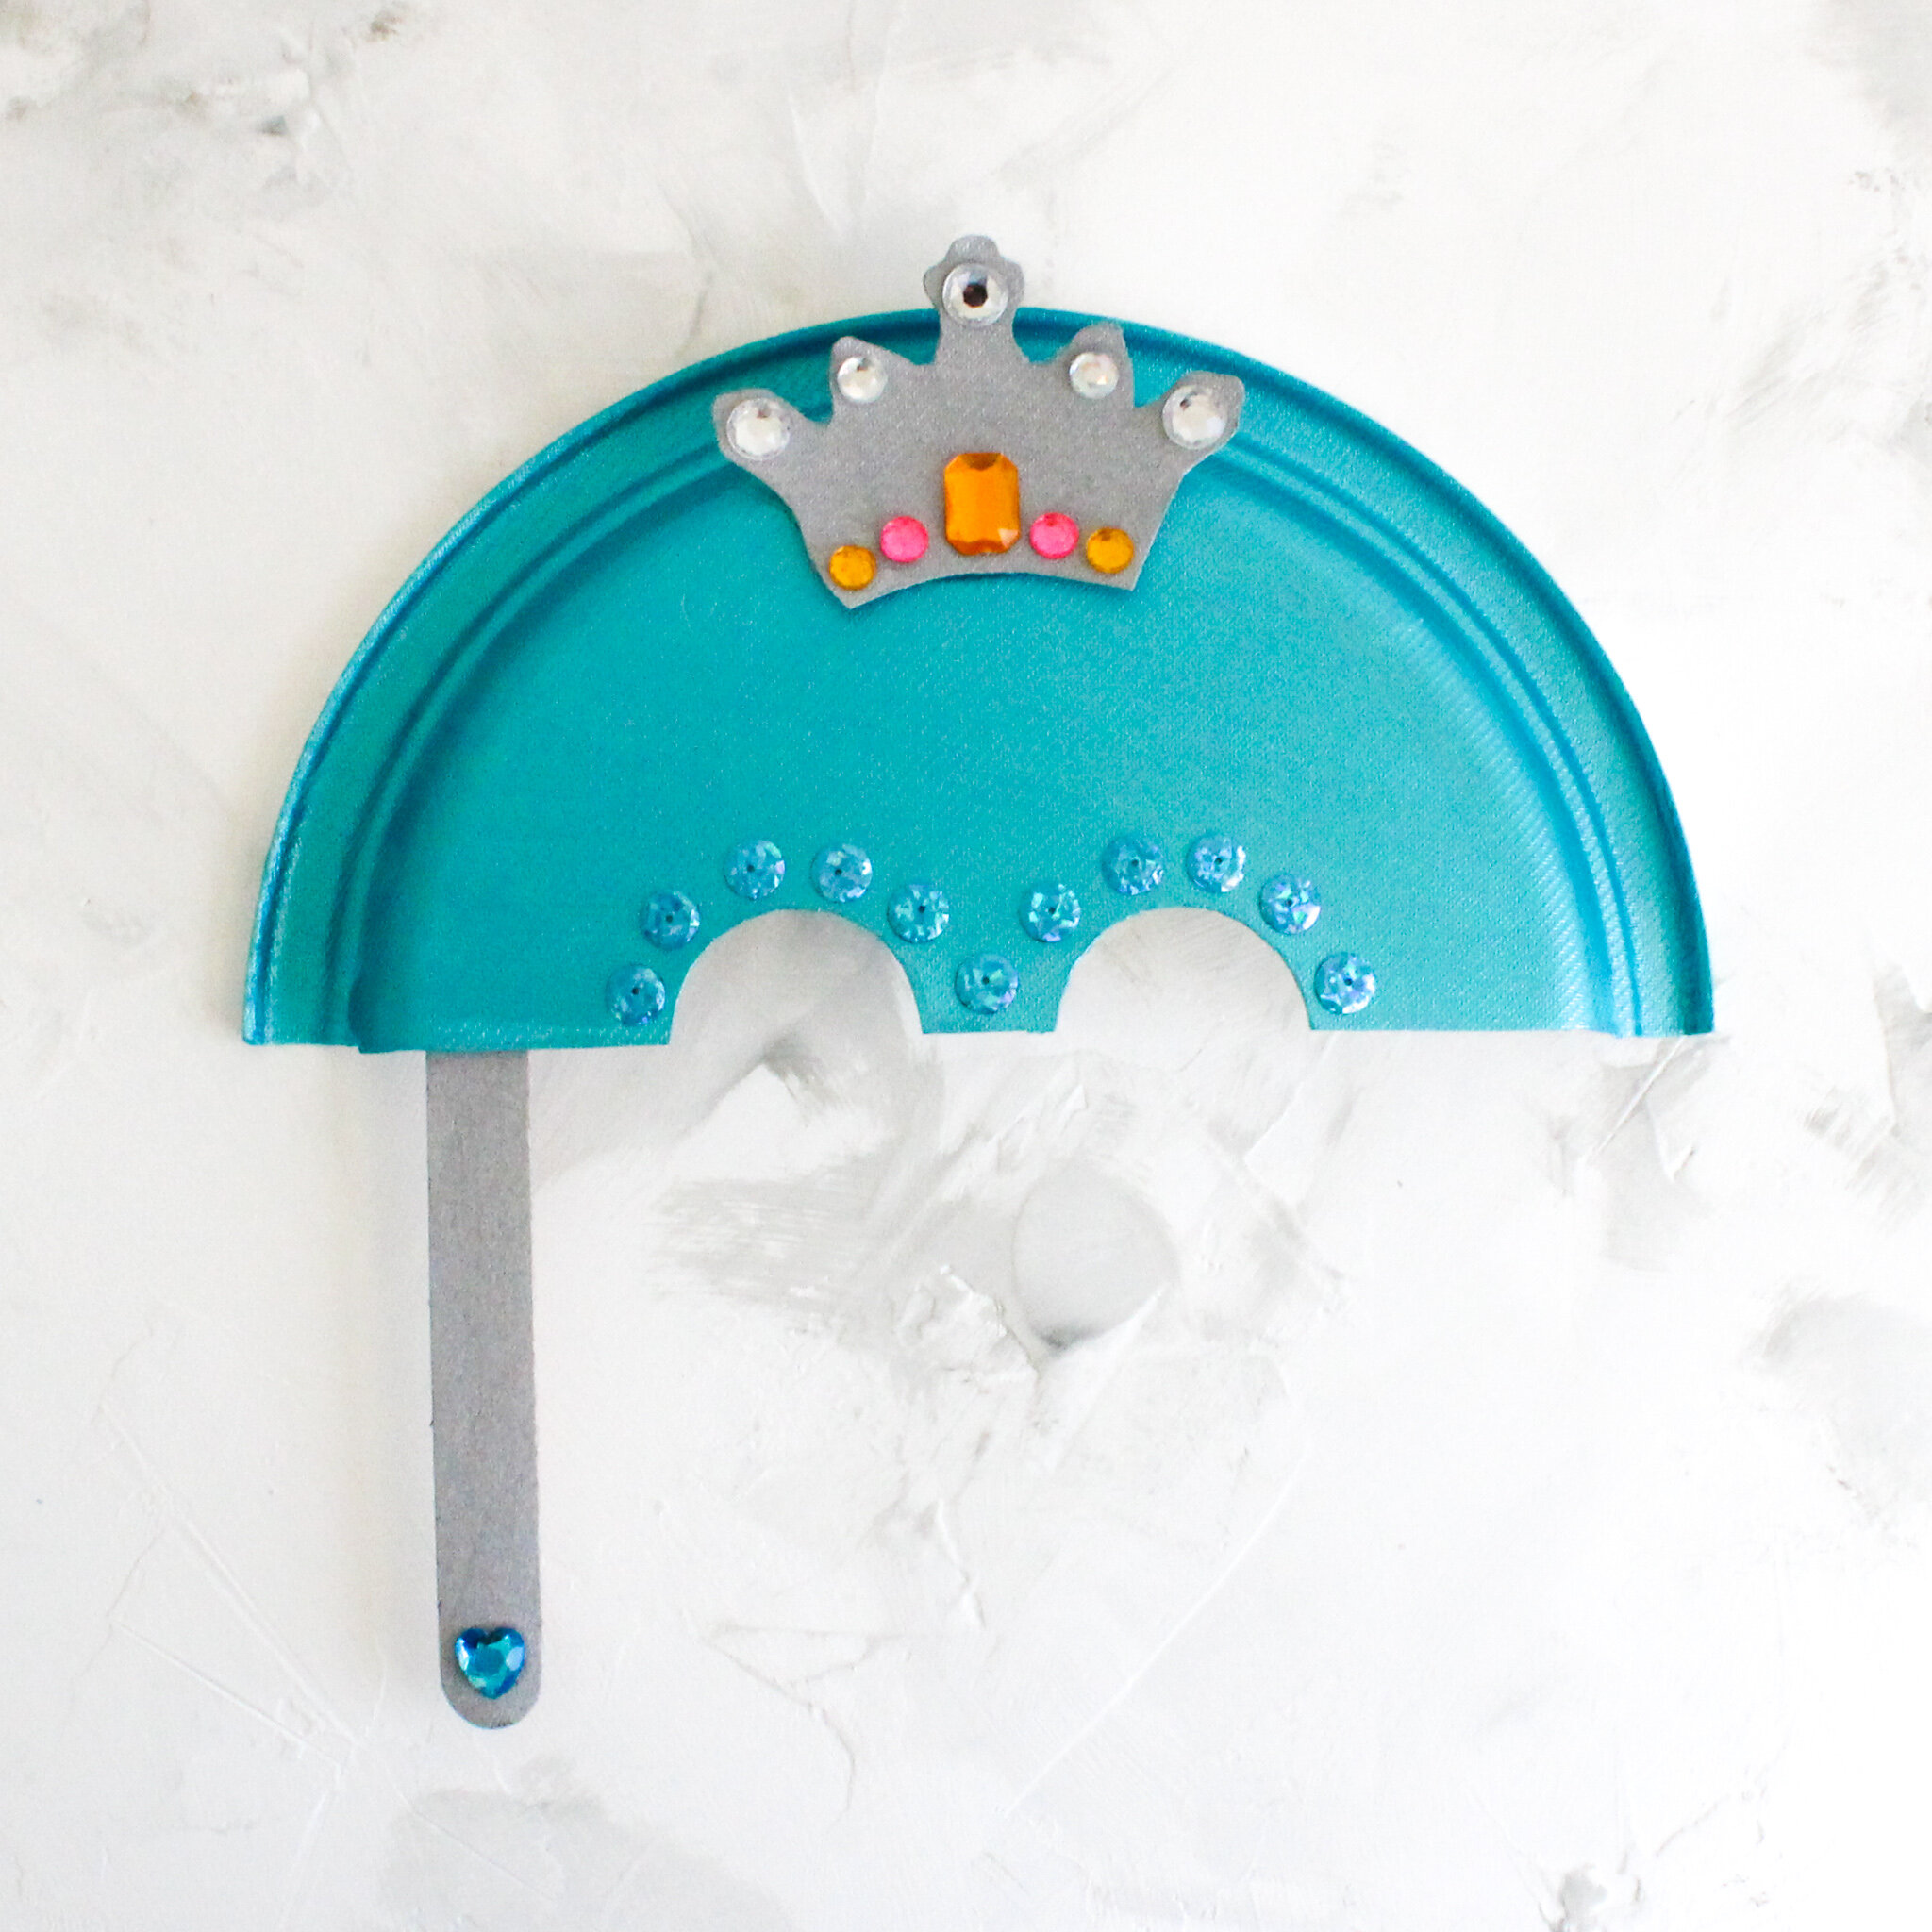
PURIM PAPER PLATE MASK
It’s truly amazing all the crafts one can make with a paper plate, and this festive craft is no exception! Have your kiddos cut a paper plate in half — one half will be for the main part of the mask, and the other half can be used to create something extra, such as a crown. Then they can paint and decorate it however they like; and for the last step, they’ll glue on a craft stick, which they will hold when they put the mask up to their face. It’s so simple, yet there are endless options for creativity! Enjoy!